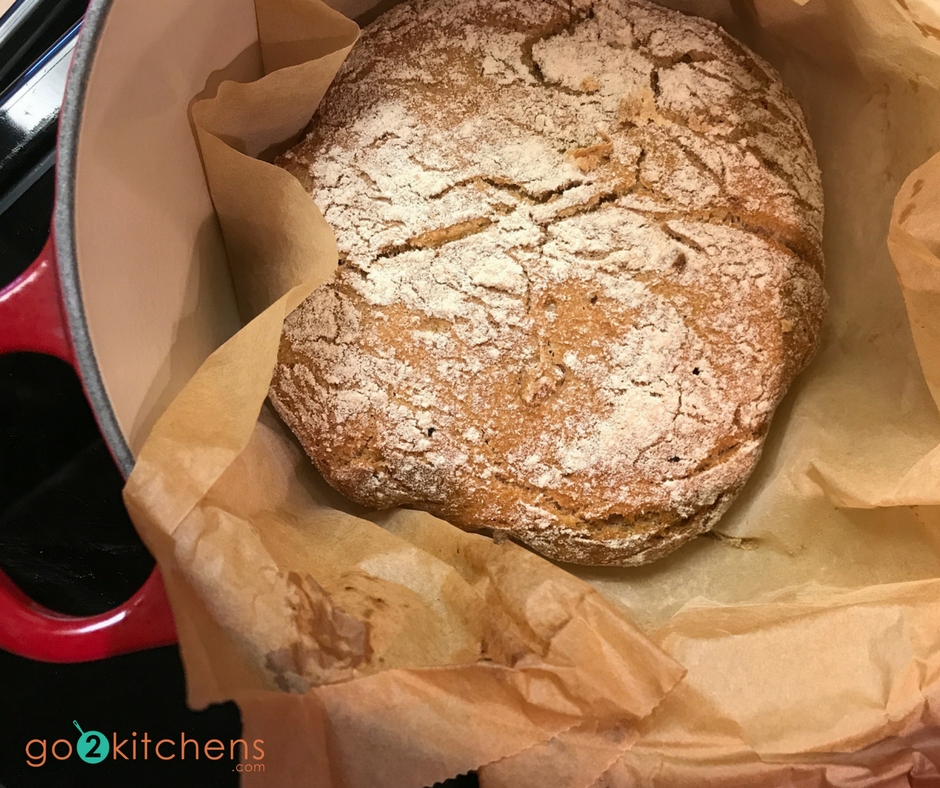
Healthier No Knead Dutch Oven Bread
Confession, baking freaks me out. It is so precise and requires a bit of good cooking karma as far as I am concerned. So when I found a method of making a Healthier No Knead Dutch Oven Bread I got pretty excited. This recipe is based on Jim Lahay’s original method of making bread in a cast iron dutch oven. I did make one switch, and that is I used King Arthur Flour Sprouted Wheat Flour which is a 100% whole grain flour. It was a good change!
I found this to be a long process but really quite simple and bad baker proof. It gives me a good base for French Toast Sticks! Plus you know that when you are controlling the ingredients in your kitchen that #cancerhatesit.
Oh and if you find it odd that I am teaching you a gluten-filled recipe, please know I feel 100% whole grains are important in our diet but only in moderation and never processed grains. I will make a blog post about why I am not completely grain or gluten-free in the near future.
Download “Learn To Meal Plan Like a Boss” right here! It’s free and will help you organize your life, save money, save time and help you stay on your healthy lifestyle journey!
Although easy to make Healthier No Knead Dutch Oven Bread does require some preparation. It is dense with a crispy crust and moist inside. Follow the instructions and you will come away with a beautiful round serving bread.
- 3 cups King Arthurs Sprouted Grain Wheat Flour, plus more for shaping
- 2 tsp Redmond's Real Salt, sea salt
- 1 tsp active dry yeast
- 1 3/4 cups warm water, heated to about 110° to 115°
-
In a large bowl, whisk flour, salt, and yeast until well mixed.
-
Slowly pour in warm water and use a wooden spoon to stir gently together. Dough will be "shaggy" (It really is lumpy yet nicely-blended with no dry spots of flour) and sticky to the touch, VERY sticky!
-
Cover the bowl tightly with plastic wrap. Place in cool oven with oven light on for 8 - 18 hours until dough rises. No more than 18 hours. NOTE: I make my dough at night and bake it in the morning) If you don't have an oven light then make sure your dough is in a warm space.
-
You will know it is ready to bake when the dough top is flat and there are bubbles in the dough.
-
Heat your oven to 450°, once preheated place your 4-6 quart cast iron dutch oven with lid in the oven and heat for 30 minutes.
-
Generously flour a sheet of parchment paper. Punch down dough (just use your fist and give the dough a little punch to remove some air). Transfer dough to parchment paper.
-
Quickly with floured hands quickly shape into a ball. Do not overwork the dough. Sprinkle the top with flour. Fold the parchment around the dough ball and let it rest while the dutch oven is preheating.
-
Remove dutch oven from the oven (carefully it will be blazing hot!) remove the lid and place the dough ball in the dutch oven. I leave mine in the parchment. If you have an enamel surface in your pan you do not have to do this but it makes for easier clean up if you leave it in the parchment paper.
-
Cover with lid and place dutch oven back into the 450° oven. Make for 45 minutes. Then remove the lid and cook for 10-15 minutes uncovered or until dough is baked through and the top is golden brown.
-
Cool slightly before serving. Remeber there are no preservatives in this bread so if you are not eating all at once. Store in an airtight container in the refrigerator to prevent mold.
I love the idea of adding some fresh garlic or rosemary to this bread.
AND WARNING! Your house will smell like heaven with this recipe!
DON'T over do it bread like this is a treat, not a staple!